Wednesday, June 9, 2010

Landscape painting in acrylic


Landscapes are one of my favorite things to paint because, well, most people like them. Sometimes as an artist it is easy to get caught up in "your vision" and forget that your ultimate goal is to find someone that wants to put your art on their wall. Much of the population likes clean, organized and well thought out art that they can enjoy looking at for at least a few years. Plus, after doing a few of them you will be busting them out at warp speed, making it easier to part with them for less.

Landscape painting doesn't have to be boring. There are of ways to make them look interesting. You could make the wind look like it is blowing really hard like the above picture (actually a seascape) or do a painting with something on fire. The normal tranquil lake in a forest scene works well too.

What ever scene you decide to paint there are few tricks that will save you tons of time.

1) Paint the background first!
Classic rookie mistake is to jump right into the meat of the painting which is usually located in the middle ground or foreground. Painting anything but the background first is going to leave you spending hours of time painting around everything you foolishly painted first. Paint the background, let it dry , then start on the rest of the image.

2) Paint in layers.
This goes right along with painting the background first. Paint all following "Layers" of the painting as you perceive them getting closer. That means that all objects in the foreground should be painted last and vice versa.

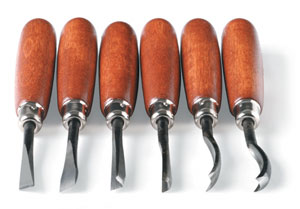
3) Experiment with a wide variety of tools.
Brushes in all their variety, sponges, rollers, palate knives, straight edges, virtually anything can be used to apply paint. Try them all to see what they do. Some will be major time savers or give you an effect you could not have done yourself. You can even scratch through layers of wet paint reveling what is below or let it dry and sand through it. Go crazy!

4) Don't paint super tight.
Expressionistic paintings are really one of the coolest paintings to look at. From a few feet away they look like a 4th grader painted them. From 15 -20 feet away they look photographic. Stay loose and you will probably master that effect. It helps to get some distance on your painting every now and then by walking away and seeing how it looks from afar.

5) Use photographs.
They are quick and easy and you will have all the time you need to do your stuff. Not that you shouldn't go paint from life, Its just more likely you will get a sunburn. Use a projector if you have one. (after you paint the background) This isn't about drawing after all its about painting.

6) Mix colors.
No one likes to see colors straight from the tube. They are super boring. Mix your paints and make a color that has never been seen before! Really!


Thursday, June 3, 2010

My art car

The art car is one of my favorite forms of art expression. I like them because they are literally traveling museums. They tell the world that you are an artist no matter where you go. There are even huge festivals for art car enthusiasts.

I made my art car from a 1994 ford ranger. Most art cars are made from older vehicles for reasons I'm sure you can guess. My car had a horrible red and green paint job as seen in the picture. I decided to make my ugly car into a beautiful desert storm military vehicle. The upside-down "V" on the side was used on humvee's in the Desert Storm War so that the U.S. would not fire on its own vehicles. The "V" stands for victory. (All of the "V" information was provided by a friend of mine that served in the war.)

Other special features and future plans for my art car:
The picture doesn't show the details but I have popped rivets all along the body, hood and camper to imitate armor. This was a long process as rivets have to have a hole to go into before the rivet can be set. So I had to drill tons of holes before beginning the difficult task of riveting.

The custom flat khaki paint job was no small task either. It took several hours of masking windows before I began the difficult task of using spray paint to cover the entire surface of the car. Before spraying the car I had to sand the existing clear coat to make sure the paint would stick. Since the rivets were exposed aluminum I had to spray them with a primer.

I also painted all the chrome surfaces which was a process in itself. Painting the chrome rims and bumpers required me to sand them, spray them with a special etch primer then paint them khaki. The entire paint job took 8 cans of spray paint and two cans of primer.

Along the body there are custom stencils I painted using spray paint. This required some time as I had to make sure the stencils were level and properly spaced.

The Inside cab is next on the to-do list. I want to customize all the interior to match the grungy military style. I currently have installed a CB radio and have camo seat covers. I also plan to add bullet holes (not from a real gun) and a smallish dragon to the front of each side. I want to add areas that look like they have taken some damage as well.

So get out there and make your clunker into a masterpiece!

Tuesday, June 1, 2010

Pop Art Style


The pop art repeating image always makes for a fun and interesting art piece. Here are some student samples from when I was student teaching. These paintings make great beginning art assignments because advanced drawing skills are not required Drawing is usually the lesson where young artists get discouraged.


To make your own pop art painting you only need to draw your image one time. After that you can simply use a piece of graphite paper to copy the image over and over in the different squares. Once the drawings are in place it is time to start painting. Make sure to use some of the same colors throughout the painting to help move the viewer's eye around the piece going from similar to similar.

Friday, May 28, 2010

Expressive Painting 101


Expressive painting 101

Step 1:
Find an image of something you want to paint. I strongly recommend high contrast images in black and white. A high contrast image is one that has a lot of strong dark areas and a lot of light areas. I recommend black and white so that you do not get attached to any colors in the original.

Step 2:
Decide what you are going to paint on. It can be any size or shape you want. I actually recommend working a little bigger as it will make the painting part more fun. The above painting is a piece of 4x4 foot Masonite. Once you have decided what you are going to paint on you need to buy some black gesso and paint it black. A black background is essential for this type of painting because we want some of the black to show through and give the painting a gritty sort of look.

Step 3:
Transfer your image to your painting surface. A white piece of conte or charcoal will be your best choice because it will show up nicely against the black. A projector is essential to transfer and enlarge you image. I use a little projector called the tracer that I bought at Michael's with a 50% off coupon. It is an irreplaceable tool that is worth the money you will spend on it.

Step 4:
Once you have your image transferred it is time to start painting. Get everything set up before beginning to paint. I like to have about 10-15 brushes of all shapes and sizes ready to go so I don't have to spend time cleaning brushes while I am working. When you want to switch colors just toss your paint brush in your water bucket and grab a fresh one. You can clean them all when you are finished painting.

Now for the paints. I squeeze at least 10 different colors on to my pallet before getting started. High viscosity paint works the best but is a little pricey. I like to use the entire spectrum of color so I put a little from each of the color groups plus white. I like bright versions of colors too like lime green etc. My application strategy is simple. Dark areas are painted in cool colors (blue, green and purple) and light areas are painted in warm colors (red, orange and yellow) Use white only to mix with other colors and do not apply it otherwise. Do not use any black paint. Make sure to mix the colors either during the application to surface or beforehand. You don't want to many of the colors to look like they came straight from the tube.

Try your best to finish in one sitting by painting quickly and expressively. Keep a used dish towel to wipe off any paint that has gotten too muddy or that is just not working. Make sure to keep the original black and white xerox or photo handy to look at during the process. I clip it to my painting surface so I don't have to keep looking down at it.

Also, make sure to have consistency in your color choices. For example, I painted John's hand in the painting above red orange just like his face. Since it is still his skin tone it should be in the same color scheme so your viewer understands what it is.

Step 5:
Touch ups. When the entire painting is done there will be areas that don't look right. Go back and make the changes the painting needs. A good way to find areas that need tweaking is to step back from the painting so that all the details blend together. Another way is to take a picture of it and look at it on the LCD of the camera.


Monday, May 10, 2010

Block Printing 101


Block printing is an art form that really appeals to me because if involves wood carving that ends in a two dimensional piece of art that can be framed and hung on the wall. So you need to have a love for word working and handyperson skills in addition to a good artistic eye and some muscle to make the prints. Block printing is a form of relief printing, relief printing can be done on linoleum or wood. I prefer wood because it can be printed without a press which most people don't have.

Choosing a piece of wood:
Hard wood is the type of wood that has to be used because it will be able to stand up to the pressure put on it when you start printing. I was trained to use maple or poplar. I have tried both and they seem to work about the same. The main thing to look for in a block of wood is that it lies perfectly flat and doesn't teeter when on another flat surface. Don't use porous woods like oak and cherry as they don't cut well and they tend to be too brittle.

Preparing your block:
Once you have chosen and cut your block to size you can prepare your block using a medium grit sand paper, sanding it smooth on the side you are planning on using. It is also necessary to bevel the edges of the front side of the block so they don't cut into your paper when you print. Once you feel that your block is nice and smooth and the edges are beveled you will need to paint the printing surface of the block with watered down, black, acrylic paint. Black is used because it is easier to see what you have cut away on a black surface as what you cut away will become white again.

Getting your image on your block:
Now that the block is sanded and painted you are ready to get an image and carefully transfer it to your block. Since your block is painted black it will be necessary to use white charcoal or conte in your drawing so that you can see your lines. If you are really good at drawing you can draw your image directly onto the surface. Remember, whatever you draw on your block is going print backwards in the final image. Because of this it is a good idea to avoid lettering or anything else that could accidentally turn out backwards. I do not like to spend a lot of time in the drawing phase so I use a photo transfer technique. To do this you will need a copy of your image that fits your block. Kinko's is a good place to get a xerox made of your image that in the same size as your block, they even have a mirror image copying mode so you can reverse the picture so it turns out the right way when you print. A good way to transfer an image to your block is take a piece of white conte and rub the back side of your xerox. Once the paper has been rubbed all over place the drawing face up on your block. you can now trace over your xerox with a pencil and the white conte will be transfered to your block's surface.

Carving the Block:
Now that your image is transfered you will be ready to start the delicate and time consuming process of carving. This will be done using special wood block chisels. Dick blick is a good place to buy these. Expect to spend about 40 bucks on a good set. You will also need a wood mallet ( I made on from a piece of wood) and a bench hook (which can also be made from scraps). Carving is done by placing the tip of your chisel on the wood surface and knocking the back of it with your mallet. You should be able to remove a small and controlled piece of wood out your block with some gentle taps of the mallet. Even the finest line carved in the wood will allow an imprint when printing. The idea of chiseling is that all the areas that are removed are going to be white while everything left untouched will be black. This is because when you roll your ink out onto your block it will only hit the high areas that you didn't chisel down. Continue to chisel out all the spots that you want to be white. Chiseling with accuracy can be a difficult task. A helpful way to get straight edges and lines is to use an exacto knife and a metal ruler before chiseling. Put your ruler down and run your exacto blade along the line you want to be perfectly straight. When you get close to an edge you have cut with your exacto knife it can easily be removed and will have the perfect straight edge you want. Chiseling is something that takes a bit of practice to get the hang of so start with the areas of the piece with less detail. To fully chisel out your entire piece should take a good amount of time depending on the detail you have chosen. I would recommend working an hour a day until you are done. The bench hook is a device that is used to hold the block in place using the edge of the table. Without a bench hook your piece will go flying every time you chisel it.
The last thing that needs to be done to complete the block is a layer of shelack. Use a cheap brush to spread it on as it will ruin your brush. Make sure the shelack is completely dry before trying to print.

Printing:
Printing is a difficult and exact part of the process. A professional artist would hire a crew to do this part for him or her since the creative part is over. This is the part where you are going to build some muscle as it requires you to use your arms to rub the back of the paper for quite a while to get a good amount of ink saturation onto the paper. The materials you will need are black printing ink, a large piece of glass to roll the ink onto, a brayer (a small roller for printing), masa rice paper to print on, a wood holding device to support your papers edges while you print (four pieces of wood that you can place around your block will do fine) and something hard to rub the back side of your paper with (I like to use the those glass scented candle lids). Feel free to try rubbing with different things as long as they will not tear your paper.

To start the printing process squeeze some ink onto the glass and rub over it with the brayer. Keep rolling until the ink is a thin layer on the sheet of glass. while you are doing this the brayer will be receiving a thin layer of ink. Now you can roll the loaded brayer onto your completed block. Roll over each area a few times to ensure plenty of ink is on all the surfaces. Go back and reload the brayer as often as needed. The block is fully loaded now. Now you have to put you paper on the ink and rub the back of it for a while. It is a good idea to put some marks on your paper and on your wood mounting system so you can put your paper down exactly where you want it. Moving your paper after you have placed it will increase the odds of marks that you don't want on your paper. When you begin rubbing fee free to carefully peel parts of the paper back while still keeping it in place to check if the print is getting dark enough and going on well. Rubbing the back of the print is a very tiring a difficult process as you have to make the sure the print does not move while you are rubbing it. Another thing that must be taken into account is that your paper is larger than your block. The paper needs to be supported by boards that are the same thickness of your block. Without this you may damage your paper while you do your rubbing.

Block printing is a lot of work but is great experience once you commit your self to the challenge. It also brings a great feeling of satisfaction to do something the way is was done before the invention of modern technology. Go make a print!

The above picture is a block print done by Ryan Morgan of the Salt Lake Temple in Salt Lake City, Utah.


Sunday, October 25, 2009

H1N1 fact or fiction?

I have been amazed these days with all the media coverage of the N1H1, swine flu. When all the excitement started a while back I thought it was going to all blow over as people became more aware. It seems like lately the hype and fear has just gotten worse. If you are fretting over the swine flu check these links. They are a little long but very interesting and worth watching.

This video shows how the same swine flu came around in the 70's and the pharmaceutical companies capitalized on a media scare to ensure vaccinations. As you can see, It's a lot of hype looking to scare us... remind you of anything happening today?

Here's another that really spells things out. It talks about the connection between over vaccination and autism and other harmful diseases. Its a very interesting video that is worth your time.

What do you think?

Saturday, September 6, 2008

A reason to vote.

This is the last two months before the big election. Because of this, I felt inclined to throw caution to the wind and forget my principles to not talk politics. Now i don't make this decision lightly, usually politics is sacred ground that i tread lightly on so as to not lose any friends or make any enemies. i'm sure you can relate, we've all been burned by opening our mouths around the dinner table Sunday evening or in front of the life long friend we didn't know was a staunch believer in the opposite direction. Yes, I know you can think of at least one experience off the top of your head.
Well, I think this time around I need to take the risk and give a good mention to the way I am going to cast my lowly vote. Obama. Now if you were thinking the other way that is okay! I totally respect that and you don't even have to mention that you read this to me. We can go on in harmony, living in peace the next time we meet. No worries!
But before you grumble away ( or smile because you're in support too ) I urge you to spend 15 minutes of your life and watch one of his speeches. He is truly inspiring and I honestly feel he will be a great and monumental leader for the dark and difficult times that lie ahead. Just HAVE A LOOK, you owe it to yourself and your country to be well informed.